
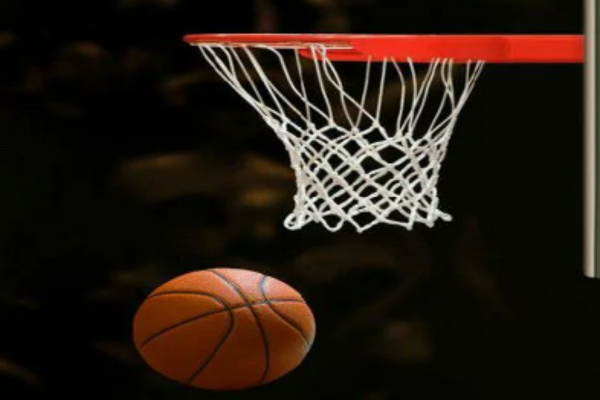
Whether you grew up playing basketball in your driveway or at the local gym, you probably remember the thrill of shooting hoops and watching the ball sail through the net. While the net might seem like a minor detail, it actually plays a significant role in the game. Not only does it slow the ball’s descent, but it also helps prevent injuries by guiding the ball downward instead of allowing it to bounce unpredictably out of the hoop.
But what do you do when the net starts to deteriorate? If you’re dealing with a rotting, torn, or old net, don’t worry – replacing it is easier than you think. This guide will walk you through the process of putting a new net on your basketball hoop in just a few simple steps!

Replacing a worn-out basketball net isn’t just about aesthetics—it’s crucial for both safety and performance. Without a net, the ball can bounce erratically out of the hoop, leading to potential injuries. If you’ve installed a hoop in your driveway or yard, skipping the net could even make you liable for accidents that occur. A net helps ensure the ball drops safely to the ground, reducing the risk of unpredictable bounces.
Additionally, practicing with a net helps you get accustomed to how the ball will fall, improving your shooting accuracy and reaction time. Players who practice with a net also get better at handling situations where the ball may get stuck, preparing them for real game scenarios. A well-maintained net also adds to the aesthetic appeal of the hoop, making your basketball setup look more professional and complete.
Safety Guidelines
Before you start installing or replacing the net, make sure you’re following safety protocols. If you’re setting up a new hoop, it’s best to attach the net before securing the hoop in place, so you don’t have to do it while it’s high off the ground. If you’re replacing the net on a mounted hoop and can’t lower it, be sure to use a sturdy stepladder on flat ground.
Always have a friend with you for assistance and never lean the ladder against an unstable surface. Additionally, make sure you’re wearing appropriate footwear to prevent slipping while on the ladder. It’s also a good idea to double-check that all tools and equipment are within easy reach to avoid unnecessary movements while working at height.
How to Replace the Net
Putting a net on your basketball hoop is a straightforward process. Here’s how to do it:
- Prepare the Net: Begin by identifying the loops that form the edges of the net. Pick one loop to start with. Make sure the net is untangled and free of twists so that the loops align correctly with the holes on the hoop. This will make the installation process smoother and quicker.
- Attach the Net: Insert the chosen loop through the first hole along the rim of the hoop. Pull the loop down and spread the rope through the small openings in the hole so it stays secure. You’ll notice small raised or lowered edges in the hole that will help hold the loop in place. Ensure the loop is pulled tight enough so that it doesn’t slip out but not too tight that it damages the net.
- Repeat the Process: Once the first loop is secure, move to the next one and repeat the process until the entire net is attached. Make sure each loop is inserted into a separate hole and that the net is evenly distributed around the hoop. This step ensures that the net hangs evenly, creating a balanced look and consistent performance during play.
- Check for Stability: After all the loops are attached, give the net a gentle tug to ensure its securely in place. If it stays put, you’re good to go! If it seems loose, double-check that the loops are properly threaded into the holes. A well-secured net will not shift or fall during use, and checking stability prevents the need for reinstallation later.
Tips & Tricks for Installing Your Basketball Net
Warm up the net first
If your new net feels stiff, leave it in the sun for 10–15 minutes before installation. It’ll be more flexible and easier to manage. This is especially useful in colder weather when the material can become rigid. A warmed-up net is easier to stretch and loop through the rim. Looking for the perfect net for your setup? Check out our top-rated basketball nets for the best performance and durability!
Use gloves
Some nets—especially metal chain nets—can be rough on your hands. Wearing gloves will protect you and give you a better grip.They also help prevent rope burn or blisters, especially if you’re adjusting a tight-fitting net or working for an extended period.
Try zip ties (for backup)
If a loop refuses to stay in place, a small zip tie can hold it temporarily without damaging your hoop.This trick works well for older or rusted rims where hooks might be worn down. Just snip them off once you’re done or leave them if they blend well.
Choose the right net
Nylon is best for home use, while chain nets are more durable for outdoor courts. Make sure the net matches your hoop’s size.Double-check if your hoop uses hook-style or loop-threading attachments—nets are designed differently for each.
Tug after installation
After you finish installing the net, give it a few firm tugs to make sure all loops are securely in place.This also helps stretch the net slightly, ensuring it hangs evenly and doesn’t get caught on the rim during play.
Check compatibility with breakaway rims
If your hoop has a breakaway or spring-loaded rim, make sure the net doesn’t interfere with its movement. Some heavy-duty nets can affect how the rim functions, so always read your rim’s specs if unsure.
Frequently Asked Questions

How long does it take to put a net on a basketball hoop?
The process typically takes 10-15 minutes, especially for beginners. It’s a straightforward task that can be done in no time once you get used to the steps. If you’re doing it for the first time, take your time to ensure each loop is secured properly.
Can I replace the net without taking down the hoop?
Yes, you can replace the net without taking down the hoop, as long as it’s within reach. Use a sturdy stepladder on flat ground to give you the height you need, and ensure you have a second person to assist if needed for added safety.
Do I need to use a specific type of net?
It’s best to use a net that fits your hoop’s specifications. Most nets are designed to fit standard-sized hoops, but make sure you check the size and style to match your basketball hoop. Some nets are made from nylon, while others are made from metal for greater durability.
What if my basketball net is too tight or too loose?
If the net is too tight, you may need to loosen the loops or adjust the tension to avoid damage to the net. On the other hand, if it’s too loose, check the placement of the loops to make sure each is properly threaded into the rim and evenly distributed to avoid the net sagging.
How can I tell when it’s time to replace the net?
Over time, the net will wear out due to exposure to the elements or frequent use. Look for signs of fraying, tears, or significant wear in the fabric. If the net no longer hangs properly or is causing the ball to bounce unpredictably out of the hoop, it’s time for a replacement.
Can I wash or clean my basketball net?
Yes, you can clean your net to extend its life. Most nets can be washed by hand with mild detergent and warm water. Avoid harsh chemicals or machine washing, as it could damage the fabric. For a quick clean, simply hose it down and let it dry completely.
Conclusion
Installing or replacing a basketball net might seem intimidating at first, but once you get the hang of it, the process is quick and easy. Not only does it improve your game by mimicking the conditions of professional play, but it also adds safety and functionality to your hoop. Remember to take your time, stay safe, and don’t get frustrated if it takes a little longer than expected. The effort is worth it when you see the ball swish through the net.
What’s Next?
Thanks to this guide, you now understand the right way to put a net on your new or recycled basketball hoop! While the process can be a bit frustrating at first, once you have this skill, you’ll never forget it. If you appreciated this guide and found it educational and informative, check out our homepage.
We regularly post tips, tricks, other guides, and relevant product reviews to keep you up to date with all of the wonderful things in the world of basketball. Our guide to the best wall-mount hoops is a great place to start!